

My most favorite organization tip that EVERYONE raves over and loves! Binding my books. I love that I can make any book “flippable” and I can write more easily in them. I do this for all of my professional development and self help books. Don’t want to spend time binding? My other tip for how you can do this is at the end!
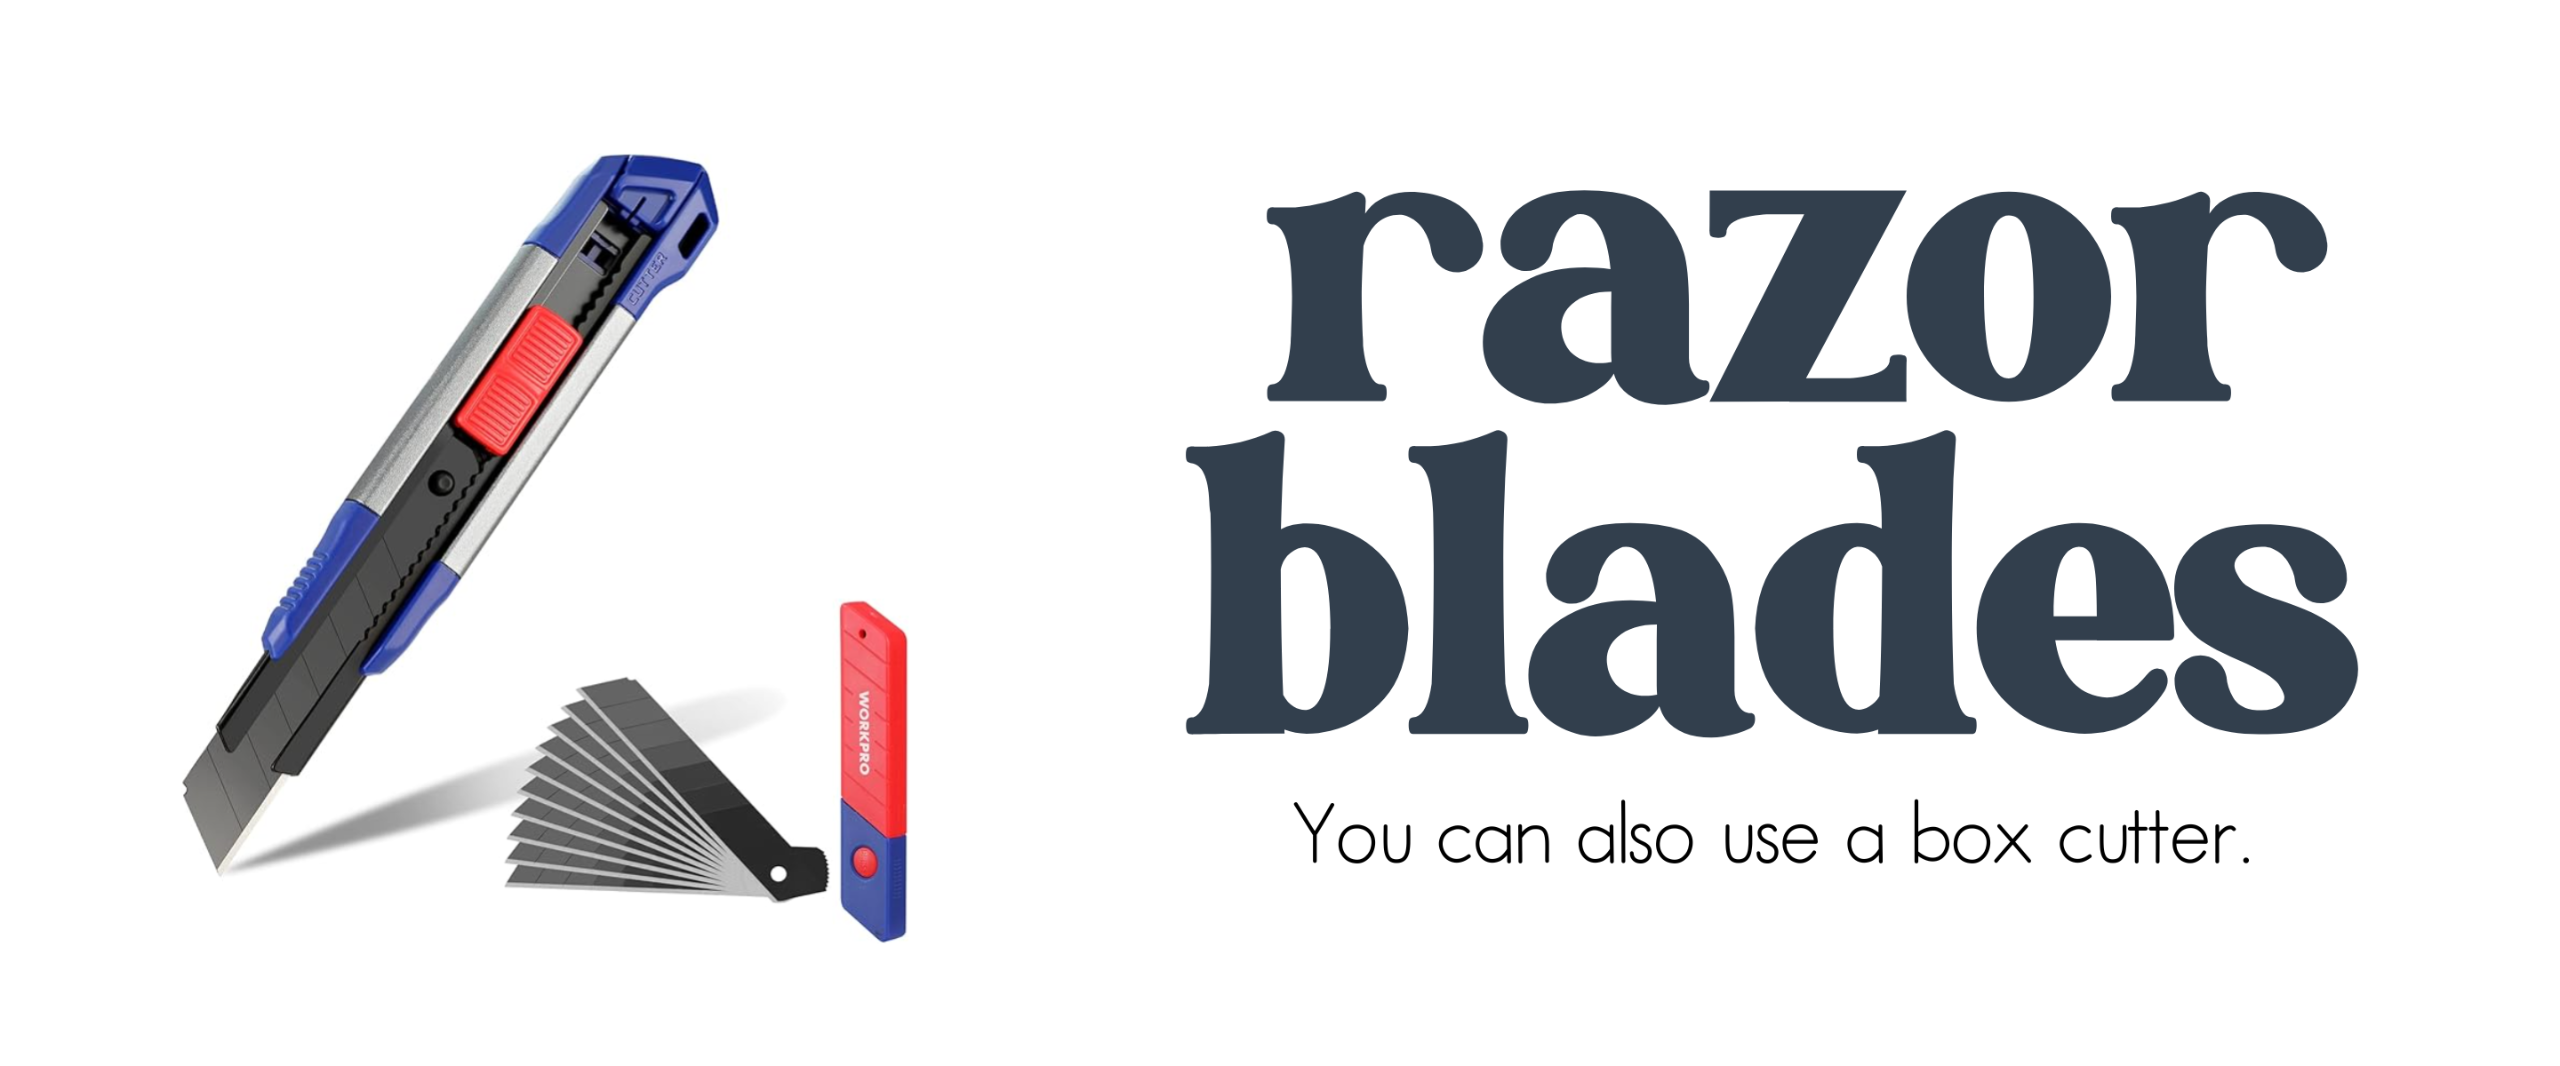
- Find you a Ryan Ellis that will do all the hard stuff for you. Just kidding, the first step is to unbind your book. Get your razor and cut the binding of your book. [Listen closely, Ryan gives really good instructions here]
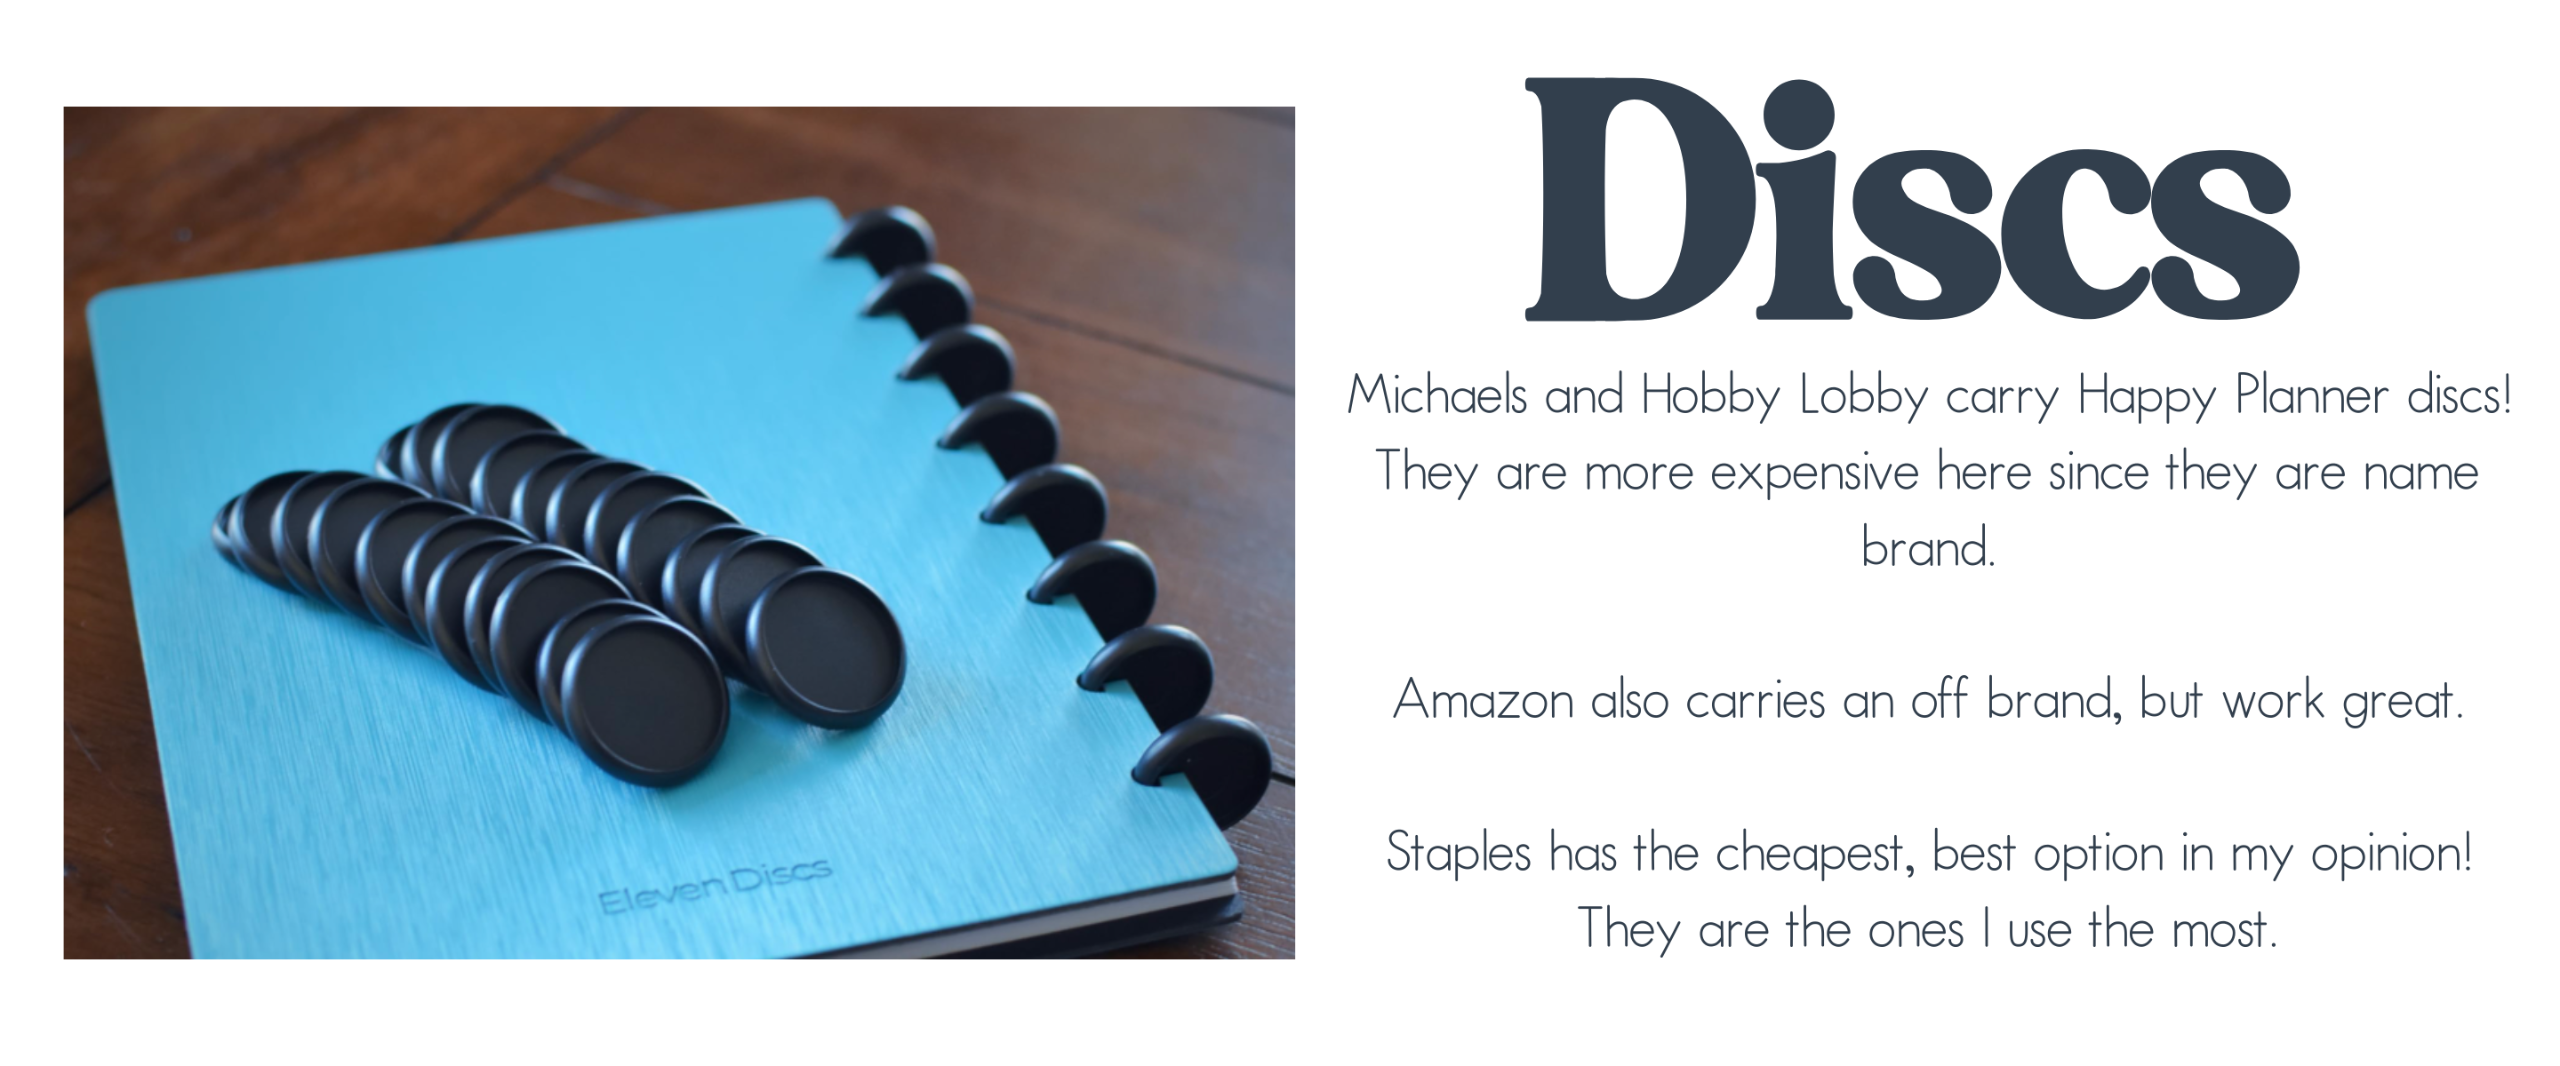
- Once your book no longer has any binding, you are going to use the happy planner hole punch. I got the 11 hole version - it’s pink; this way I can use it for larger books and smaller books. Had I gotten the 9 hole version - it’s blue, I would have been limited to only smaller books. #savemoneywhereyoucan
- Side note: This will take you a few minutes to do. You can only do a few pages at a time! Don’t put too many pages in there at a time, or your pages will get stuck and will have to be ripped out [Unfortunately, I know from experience……]
- Once all of your pages have been hole punched, you are going to take the front over and about 10 additional pages and place your discs/rings in the newly punched holes. Once you have all 9 or 11 discs into place, you will now take about 15 pages and add to the book. You will repeat this step until all pages are added.
- VOILA! You are done.
Let’s say you don’t want to go through these steps and need an easier option! I get it. Staples is a great alternative. You can take it there and they will spiral bound it for you. This does cost about $8 - 12 every time. I found that the happy planner disc system saved me money over time, but it did take more time.
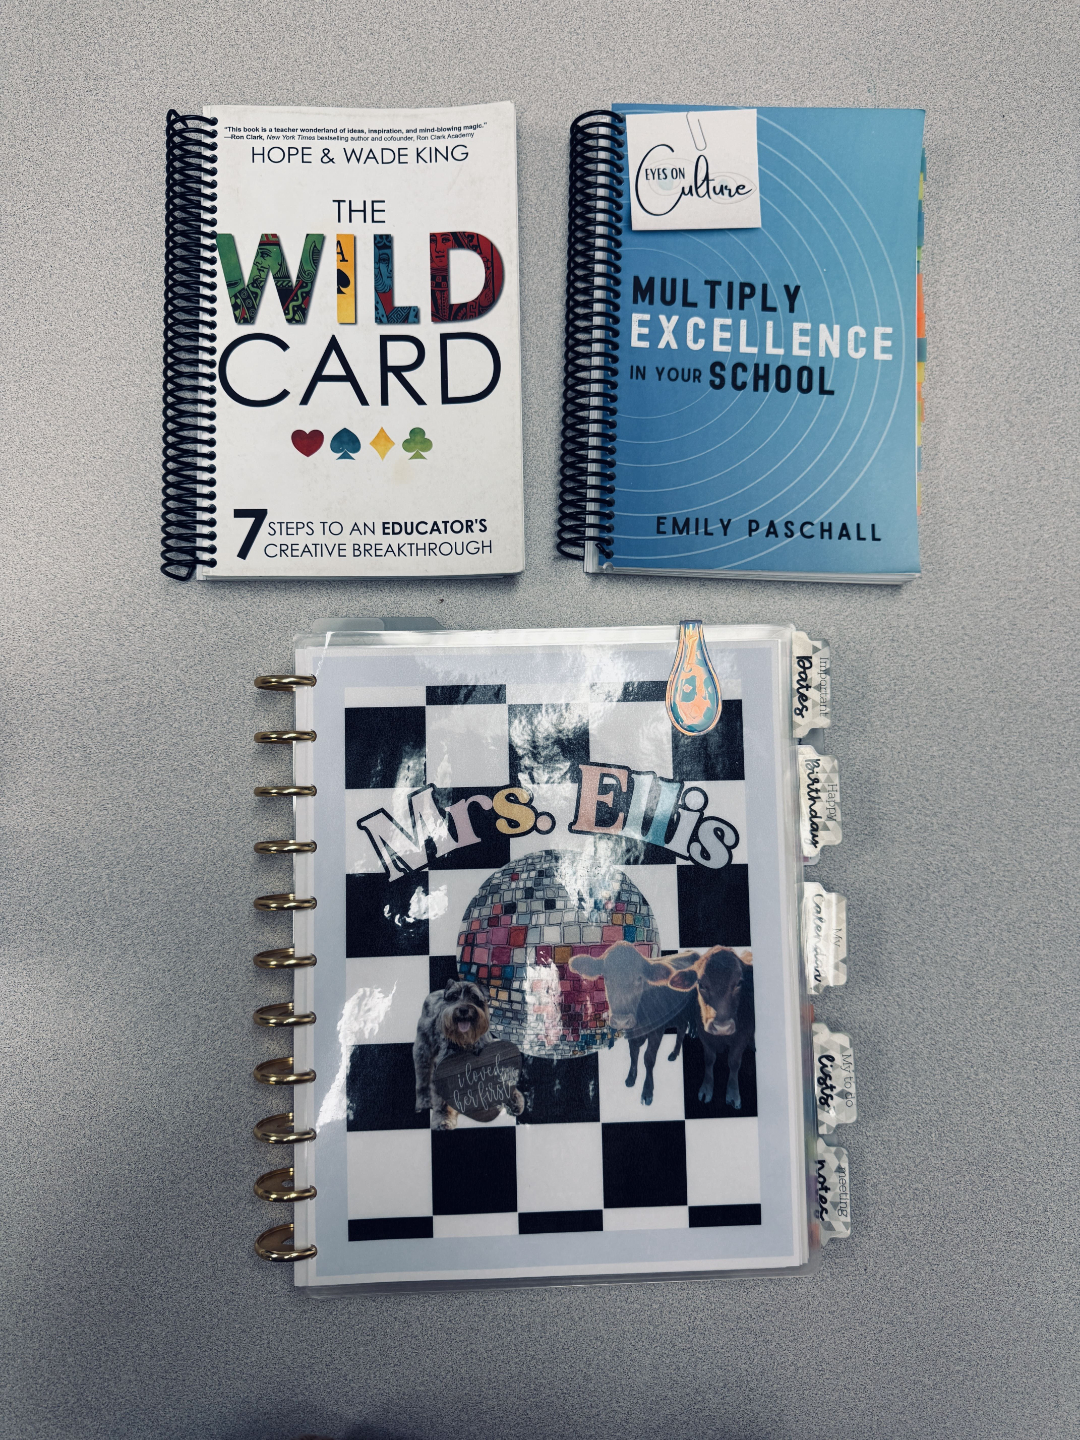
All of that to say, either is a great option! I can’t recommend unbinding your books enough. It’s been a game changer for note taking and for actually going back and reading through my notes. There are some pictures below of what they look like compared to one another!